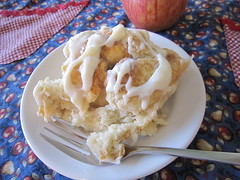
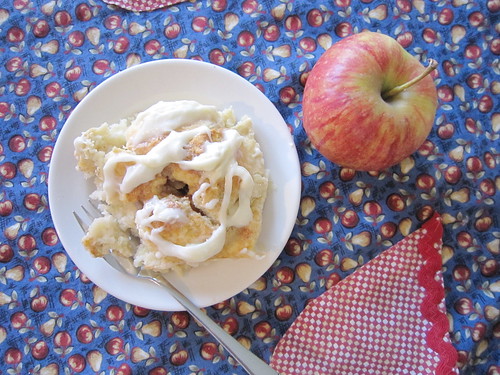
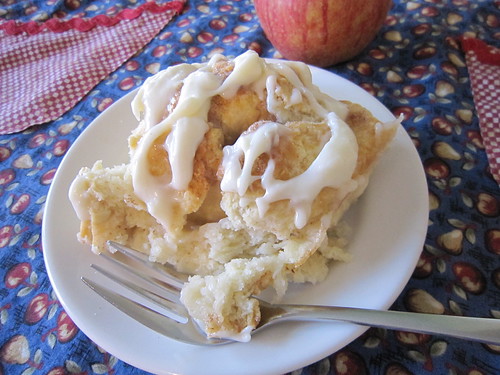
These apple dumplings are like an apple pie and a cinnamon roll rolled into one, and are perfect for breakfast or dessert. Plus the recipe is from the White House Cookbook, so it’s fit for serving to distinguished dinner guests – from presidents to your friends and family.
About the Recipe
While taking cooking classes at Living History Farms – and learning to cook like they did in the 1800s – I heard the instructors often mention the White House Cookbook as an excellent resource for recipes from back in the day.
Luckily, it is available for free online through Project Gutenberg. But recently, while on vacation near Prairie Du Chien, Wisconsin, we visited an historic old mansion from the era called Villa Louis, and in the gift shop they had several shiny new copies of the White House Cookbook! I couldn’t resist having the actual book to browse through, and picked up a copy.
On the drive home from Wisconsin, I spent some time browsing through the book looking for something new to make. There were several recipes in it I would never, ever make, like Spiced Beef Tongue (p. 119), Fricassed Tripe (p. 120), or Baked Calf’s Head (p. 127). Then I came across an Apple Dumplings recipe (p. 234), and decided I’d give that a try.
I’d never made apple dumplings before, and we had just bought a bag of apples from Shihata’s Orchard.
The thing about recipes from the late 1800s or early 1900s is that they are usually lacking in specifics like oven temperatures and exact measurements. A wood burning stove doesn’t really have a temperature dial. However, based on my experience from those Living History Farms cooking classes, I was able to figure it out. I’ll share with you here the origial recipe, and then my modified version with more specifics and a couple of twists of my own. Let’s get started!
Step-by-Step
The first step in the original reciipe was to: “Make a rich biscuit dough the same as soda or baking-powder biscuit, only adding a little more shortening.” I opted to make the Baking Powder Biscuit recipe (p. 239). That recipe calls for “Two pints of flour, butter the size of an egg, three heaping teaspoonfuls of baking powder, one teaspoonful of salt” and to “make a soft dough of milk or water.” So, I had to Google what a pint of flour was. It’s about a cup of flour. What did they do without Google in the 1800s? 
From there, it is a lot like making a pie crust. Just blend your dry ingredients and butter together with a pastry blender.
Then add your milk or water. I used milk, and I have to admit I didn’t really measure it. Just pour in enough until the dough is moistened and comes together when you stir it. I probably used about half a cup.
The next step of the recipe is to: “Take a piece of the dough out on the molding board, roll out almost as thin as pie crust.” I rolled it out on my largest cutting board, and dusted it with plenty of flour so it wouldn’t stick to my rolling pin. Now that I see this picture, it looks like I may have needed a bit more flour.
Then the next step was to: “cut into pieces large enough to cover an apple.” So, I did.
Then it said to: “Put into the middle of each piece two apple halves that have been pared and cored.” Since I had a new, modern-day apple corer, I didn’t cut the apple in half to get the core out. I was also excited to have the chance to use my rarely used apple corer.
The next step was to: “Sprinkle on a spoonful of sugar and a pinch of ground cinnamon.” I also added a bit of freshly grated nutmeg to my cinnamon sugar, and I used a regular eating spoon to measure the sugar mixture. In the cooking class I took at Living History Farms, the instructors said they didn’t have separate measuring spoons to measure teaspoons and tablespoons in the 1800s, so they just used their regular table ware. I’d guess it was about a tablespoon of cinnamon-sugar per apple. About half the tablespoon I put inisde the apple, and the other half I put on top.
Then it says to: “Turn the ends of the dough over the apple and lap them tight.” I brought up each corner of the dough to the top of the apple, then pinched together the sides.
Then it said to: “Lay the dumplings in a dripping-pan well buttered, the smooth side upward.” Not sure what a dripping pan is, or which side is considered the “smooth side,” but I put my four dumplings right side up in an 8 inch by 8 inch glass baking dish.

Next, it said: “When the pans are filled, put a small piece of butter on top each, sprinkle over a large handful of sugar.” I put about a teaspoon of butter on top of each dumpling, and sprinkled about a tablepoon of cinnamon sugar over all four dumplings.
Then it said to: “Turn in a cupful of boiling water.” I was a little worried about this step. Did that mean put a cup of water in a separate pan in the oven to steam them, or right in the pan with the dumplings? I guessed it meant to put the water right in the pan with the dumplings. I was worried this would make them mushy and gross, but the dumplings actually absorbed much of the moisture while still holding a firm texture.
That’s me taking the picture in the reflection in the tea kettle
And here’s one of the dumplings sitting in the water.

Then it said to: “Place in a moderate oven for three-quarters of an hour.” This is where, if you were in the 1800s, you would fire up your wood-burning stove. Assuming you are cooking with electric or gas, you’ll want to preheat your oven to 350 degrees, and bake for 45 minutes.
The recipe also said to: “Baste with liquor once while baking.” While I don’t know what kind of liquor it means, all I had in the house was half a bottle of white wine. I thought a better route would be to baste it in its cooking juices, assuming with all that water there would be some. But when I checked it after a half hour, the dumplings had puffed up and the juices were no where to be found, so I just let them finish baking without basting.
Now, the final step was to: “Serve with pudding-sauce or cream and sugar.” I didn’t have pudding-sauce or cream, but I did have powdered sugar and cream cheese, so I opted for making some cream cheese frosting instead.
The end result was amazing! It was like an apple pie on top, and like a gooey cinnamon roll on the bottom. With the cream cheese frosting, it was even more delicious. And I’m sure it tasted much better than Baked Calf’s Head.


