

It’s no secret that making homemade bread takes time and patience. If you are short on either of those ingredients, let me share with you a few secrets to speed things along. I’ll start with an old-fashioned bread recipe, called Knittle Bread, which I’m told dates back to the 19th century. Then I’ll mix in a few 21st century time-saving tricks.
The Story
I discovered Knittle Bread during a cooking class at Iowa’s Living History Farms. Living History Farms is basically a “living” agricultural museum, complete with a farmstead of houses and buildings built to replicate life in the early 1800s. The staff at the museum dress in period costume and teach visitors about the various aspects of farm life back in the day.
So here’s what I learned about baking in the 1800s, which made me appreciate our modern conveniences:
- Without running water, there were no dish-washing machines. Those 19th century women built up their arm strength hauling large buckets of water to and from the kitchen to clean the dishes. I do love my automatic dishwasher, and I will never complain about loading and unloading it again.
- Without electricity, there were no microwaves nor electric stoves. To boil water, you had to wait for the wood-burning stove to get hot enough. Again, the women built up their biceps hauling wood for the stove. I will no longer take my microwave and electric stove for granted.
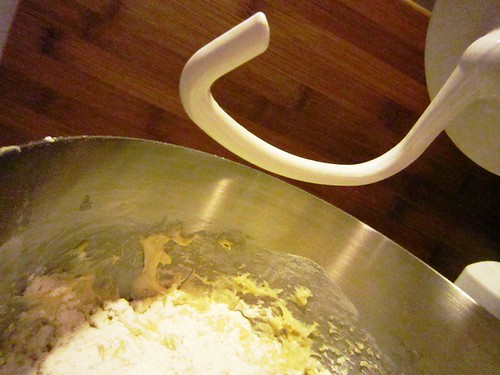
- Without electricity, there were no electric stand mixers. All batters and doughs were mixed using old-fashioned elbow grease. My Kitchen Aid stand mixer is now my BFF (Best Friend Forever).
The Moral of the Story
The Secrets
Secret 1: Use your electric stand mixer to knead the dough.
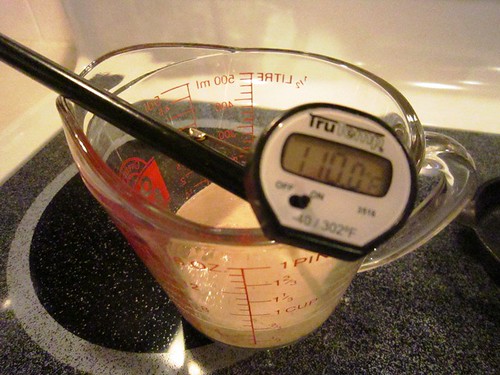
Secret 2: Use your microwave and electronic thermometer to get your water temperature just right.
It is important your water is precisely110 degrees before you add your yeast. That is just warm enough so the yeast will “grow,” but not too hot that it will kill it. To get that perfect temperature, I put my half cup of water in the microwave and “nuke” it for about 30 to 60 seconds. Then I check the temperature with my digital thermometer, before adding a package of instant yeast.
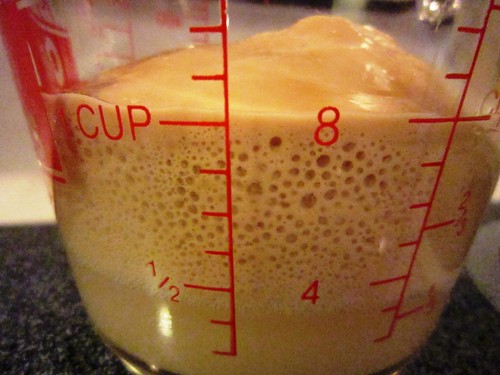
Secret 3: Use a warm stovetop to expedite the yeast-growing process.
Set your oven on “warm.” If you don’t have a warm setting on your oven, preheat it to about 160 degrees. Then set your yeast and warm water mixture on the warm stovetop to keep it warm and speed up the proofing process. Below is how it looks after about 10-15 minutes on a warm stovetop. Look at the bubbles. Aren’t they beautiful?
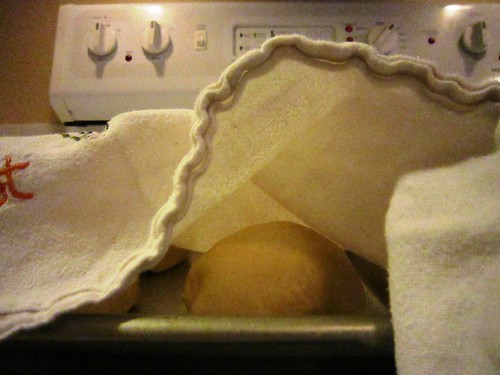
Secret 4: Use your warm stovetop to help the bread rise too.
Using the same technique to proof your yeast, after you have shaped your dinner rolls, cover them with a tea towel and place them on the warm stovetop to rise.
Secret 5: Use your dish-washing machine for a speedy clean up.
I made the mistake of washing my mixing bowl and utensils with a dish cloth. Bits of dough stuck in the cloth, but I thought they would wash out in the washing machine. I was wrong. I put the dough-covered dishcloth in the dryer with a bunch of other towels, and ended up picking out hardened pieces of dough from all my towels for weeks.

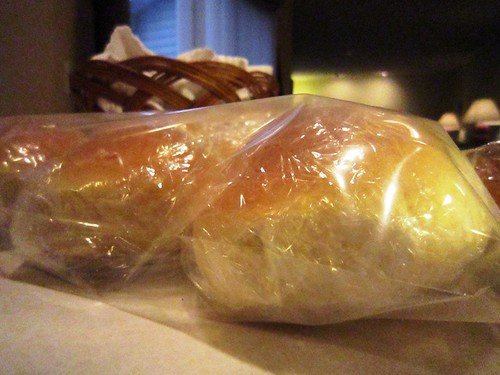
Secret 6: Use your freezer to store baked bread for fast access later.
This is probably the best time-saving secret of all. After baking, let your rolls cool completely. Then wrap individually in saran wrap. Put the wrapped rolls into a freezer bag and freeze. Whenever you want homemade bread, grab one out of the freezer, and warm it in the microwave for about 30 seconds.
The Recipe: Knittle Bread
The recipe was posted by Living In Iowa. Scroll to the bottom of the page to see the recipe for Knittle Bread.